Farmhouse Wooden Bottle Tote
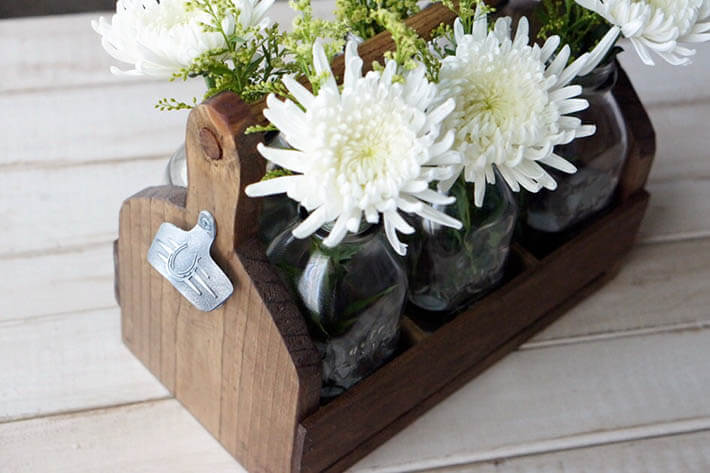
I have really been wanting a fun woodworking project lately and I saw something similar to this on Pinterest, but it was always just as a beer tote. I wanted my farmhouse wooden bottle tote to bea little bigger as to be for both a rustic decoration in the house and to carry more than just beer. So I modified it a bit and it turned out perfect. And of course Lindsey did a phenomenal job by adding her touch to it. She added the idea for the farm style milk glasses and the flowers.This really is a very simple project with the most difficult part being working with the Jigsaw to cut out the shape of the side walls, but if I could buildit then youshouldn’thave any problems either LOL!
Farmhouse Wooden Bottle Tote

Materials:
- 1 (1in x 8in x 6ft) poplar board
- Circular saw
- Drill
- Tape Measure
- Speed Square
- Clamps
- Hobby Boards
- Jig Saw
- 3/4 in Dowel Rod
- 3/4 spade bit
- 2 in Square trim screws
- 220 grit sanding block
- paint brush
- Wood stain
- Bottle opener (optional)
Directions:
Takethe 1 x 8 Poplar Board and measure to cut it to 7⅜ x 11⅞ inches long, then using the circular saw make your cuts. This will be the bottom of the bottle tote.
Next, measure and mark the hobby board to get four pieces measuring 2½-in. x 13⅜-in. long, then cut them using your circular saw.

To create the side pieces we get to do a little art. Take a sheet of paper and fold it in have length wise. Now draw half of your design on one side of the paper starting at the crease. Then while the paper is still folded cut out your shape and BAM, you have your template! The peak of my sides measure 11 3/4 in.
Once you have traced your template onto the Poplar board cut out the shape using your Jigsaw, then repeat the process for the other side.
Taking the 3/4 Spade bit, drill a hole towards the top of your two side pieces for the dowel to fit into.
Cut the ¾-in. wooden dowel down to 13⅜ in. long using a circular saw.
Now take the wood glue and ad some to the holes and on the ends of the dowel and then place each end into the side pieces to form your handle.


Apply wood glue to the bottom of the side pieces, then with the drill, secure frame together using 2-in. square trim screws.
Next, you’ll measure, mark and cut hobby boards for the inserts. These will divide the bottle tote’s interior into six sections.
Using a circular saw, cut one piece to 2½-in. x 11⅞-in. and 2 pieces to 2½-in. x 7⅜-in.
Next, using the jig saw, on the (2)7⅜-in notch out each insert a ½-in. every 3¾ inches. Make your notches 1¾-in. deep.
The last cut is the side rail. Cut 2 hobby boards to be 13 1/4 in long and cut with the circular saw. Then assemble them using the square trim screws.
Once fully assembled the last step is to stain. Using your brush and the wood stain, apply stain and remove any excess stain. Let dry and then wipe off the stain.
As an optional finishing touch you can add a bottle opener to one of the sides.


That’s it. I really enjoyed making this wooden tote and Lindsey really did a fantastic job making it a beautiful centerpiece. We found those Milk Glasses from Micheal’s and they added a great farmhouse rustic feel to the whole thing. Tell me your thoughts in the comments or if you need help at any of the stages. And as always thanks for stopping by!
Use #omtcrafts so we can follow along with any diy projects you are making!


 Lindsey and I recently went to an art show here in Houston and it was awesome. This particular show is great because it is actually on the streets of downtown and there are such a variety of artists that come from all over the country to show off their art. We usually leave inspired to go do some project around the house or for me to create a new art piece.
 With Christmas just days away, we thought many of you would be wrapping presents like crazy - so we wanted to share this super easy tutorial on how to make the perfect Christmas bow! This bow technique can be used on any occasion, just swap out the ribbon.
  The Wooden Perpetual Calendar is a gorgeous functional accent piece to any home office not to mention easy to make.


24 Comments
Leave your reply.