DIY Industrial Shelves
I really wanted some shelves in my new home office. I wanted something that was different and unique to not only the space but to my style and personality, like these DIY Industrial Shelves. I mean what says more about who you are then the shelves in your office? So like any committed DIYer I spent days (weeks) on Pinterest trying to find the perfect shelf. After loving the idea of industrial style shelves, I went to the drawing board and sketched up what I wanted and then documented it for the world to see. I think they turned out great (but i’m biased.) The process isn’t too bad and this project can be easily tackled in a weekend. So lets get to it, here is what I did.
DIY Industrial Shelves Tutorial
Getting started: Surprisingly you will find that this will be the hardest step in this process. First you will need to measure the wall that you will be building your shelves on and determine the size of your shelving. Then you will need to design and layout what you want your shelves to look like. Don’t worry if you aren’t an artist, just sketch out a rough idea and keep this with you when you go to get supplies because it helps. So what I did was just draw out what I wanted my shelves to look like and color coded the different parts ( my mind just works better this way.) I designed my shelves to be able to fit a desk underneath it on the left side. As you design your shelves keep in mind that the piping has standard sizes (6, 8, 12, 18, 24, 36) that it comes in and if you deviate ( which is ok for you rebels who hate conformity,) then you can have someone at Lowes cut/thread the pipes for a small charge of course.
* I recommend going to Lowes for this project. I found that Lowes had a better supply than Home Depot and it’s pipe area was better organized. I don’t receive anything from Lowes, I just had a better experience there on this particular project.
Tips for construction: The pipe-shelving frame is only connected horizontally by the wood shelving. Mine is attached at the wall near the ceiling and on the left side above my desk. You can anchor the piping to the floor if you would like but I found that it is really sturdy once you piece it all together.
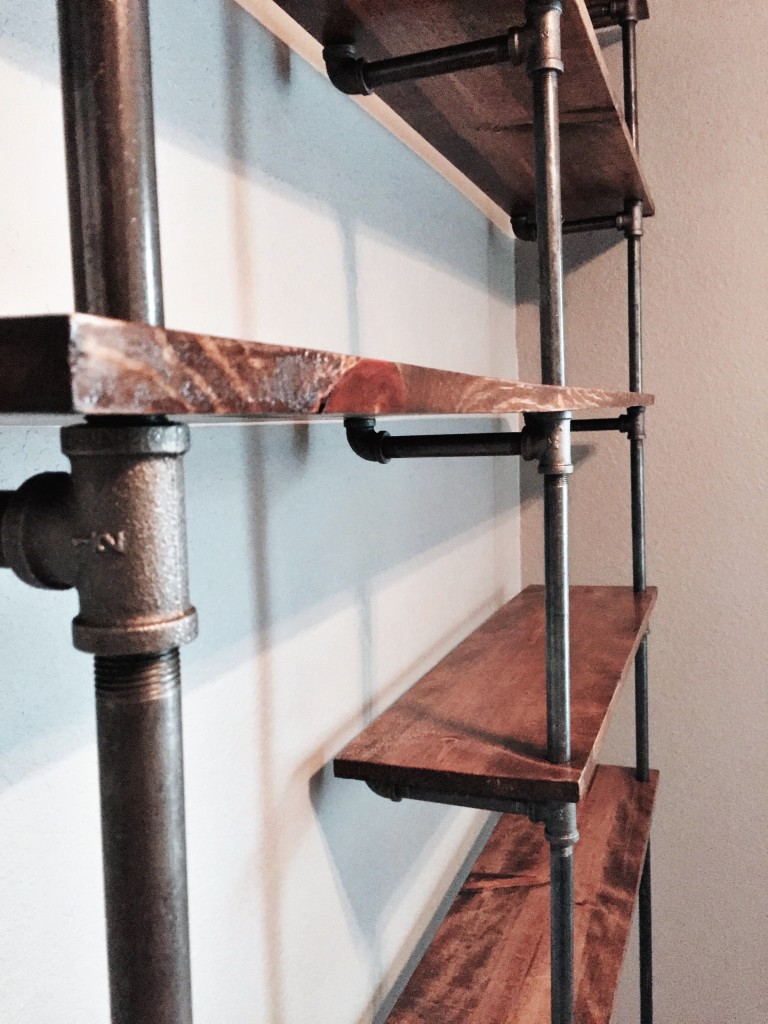
The front of each board has a hole drilled in it to line up with the corresponding piping. And each board is supported by resting on a “T” connector in the front and an “elbow” connector in the back. The simplicity here is that the wood shelf doesn’t need to be nailed or screwed down in any way and will be held in place by the piping itself.
Vertical: For me, drawing it out and color-coding the different pipes and connectors made adding up the measurements much easier.Start by just rounding all the connectors to an even number of 2 inches. Those connectors are your flanges, “T”, and elbows. The wood shelving thickness does not come into play because the piping goes thru it and so it doesn’t add to the height of the unit. On my drawing, starting with the bottom of the shelving unit, I drew in the flanges and the number 2 for 2″. Then, because I wanted to fit my art cart underneath it, I knew my first shelf needed to be above that. I drew in the 36″ pipes. Then a “T”(2 inches), then my next pipe length 12″, another “T” (2 inches), 12″ pipe, another “T” (2 inches), 12″ pipe, another 2″ “T”, a 12″ pipe and a 2″ elbow to finish it. Adding those up, my rough shelving unit height measured at 114”. This number wont be exact for a variety of reasons such as the varying heights of flanges, “T”s, elbows and pipe threads when assembling. Just give yourself a little grace to work with.
Horizontal: My wood shelves are 10″ deep. As shown in the photo above, in the front the shelving rests on 3-way “T”s, in the back, it rests on an upturned 90-degree elbow. I chose 6″ pipes for connecting the horizontal 3-way “T” to the upturned elbow. (Because the tee sits 1″ in on the 10″ shelf, measures 2″, then 6″ pipe, then a 1″ elbow totaling 10 inches. This gives my shelf the full support it needs and also keeps it away from the wall.
Before you shop: Make a list of plumbing supplies by counting up each “T”, pipe, elbow and flange and mark it on your sketch to take with you.
Materials:
* All of my pipes and fittings are ½ inch.
- (4) 1 x 10 x 8
- (1) bottle of pipe cleaner
- (1) qt of wood stain
- (1) qt of sealer
- (8) flanges
- (21) 90 degree elbows
- (15) “T”s
- (2) 36” pipes
- (17) 12” pipes
- (21) 6” pipes
- Box of screws and wall anchors
Lets build these DIY Industrial Shelves already!
The Pipes: First thing was to get the pipes ready. We had to clean off the pipes and remove all the stickers. (This part sucks but just tough it out.) We used a strong degreaser spray and old shirts to strip the pipes down. Once that was done we set the pipes off to the side for now. If you would like this would be a good time to paint the pipes if you choose to, we didn’t because I liked the look of the pipes already.
The Wood: We only had to cut 2 of our 4 wood boards. Our design has a tiered look to it so that my desk can fit underneath it. So we measured the length on those boards and made our cuts. One board was cut down to 5’ and the other was cut into (2) 3’ boards.
Next decide where you want the holes for your pipes to run through. The edges were easy but the middle 2 holes took planning. The holes at each end were close to the edge and 1 inch from the sides. (If you go with the ½ inch pipe size then use a 7/8 hole saw bit so that your connector won’t fit through the holes). When planning out your holes, consider where your studs are and how symmetrical the spacing of your pipe looks on each shelf. Once we cut the holes for the first 8‘ board we just used it as the template for the rest of the boards.After all the holes were drilled we sanded all of the boards to prep them for staining and sealing.
Staining and sealing both sides of each wood shelf is the most time consuming part of the project. This was my first time to stain wood but I just followed the instructions and they turned out great. Don’t forget the edges and inside of the holes too. I used a few foam brushes to apply the stain and you will want to have rubber gloves and lots of rags. Once the stain has dried you will want to apply the polyurethane to the boards. The will give your shelves some protection. I only applied 2 coats so that it didn’t give it a very shiny look. Again just follow the directions on the can.
Time for assembly!
This part is easy and exciting! We started by assembling the right side of our shelves because that is the side where the legs will actually touch the ground. First, we attached the bottom flanges to our bottom 36” leg pipes and then added a “T” to each one. Make sure to have your horizontal “T” opening facing the wall. Next, we attached a 12” pipe onto the top of the “T” and a 6” pipe on the horizontal part of the “T” facing the wall. To the 6” pipe I added a 90-degree elbow connector. You will want the elbows to face for so that the shelves can rest on them.
After we assembled the leg pieces, we added our first shelf by placing the holes over the piping and resting it on top of the “T” and elbow connectors. Then just continue to build the shelves in this way.
Since our tiered design didn’t allow us to connect the other two pipes to the floor we had to start those sides by attaching a flange to the wall, then a 6″ pipe and an elbow. From there you just build upward in the same way as the rest of the shelf. (Its key that the flanges be drilled into a stud because this side will hold the weight of your shelving).
The Top:The finishing touch is securing the shelving unit. After the last shelf is in place, add the last vertical lengths of pipe. Add an elbow to each one. Add a flange to each horizontal pipe piece and thread into the elbow. The flange should be touching the wall (threads will allow for adjusting). Drill the flange into the wall. If there isn’t a stud then you will need to use wall anchors.
That’s it. Now its time to decorate and add life to your new DIY Industrial Shelves. As you can see I have plenty to add to my office shelves.
Good Luck and please don’t hesitate to ask questions. Also this is my first post ever so I would love some feedback on what I could do better next time or what would be more helpful to add in the instructions. Thanks for stopping by.
John





 With Christmas just days away, we thought many of you would be wrapping presents like crazy - so we wanted to share this super easy tutorial on how to make the perfect Christmas bow! This bow technique can be used on any occasion, just swap out the ribbon.
 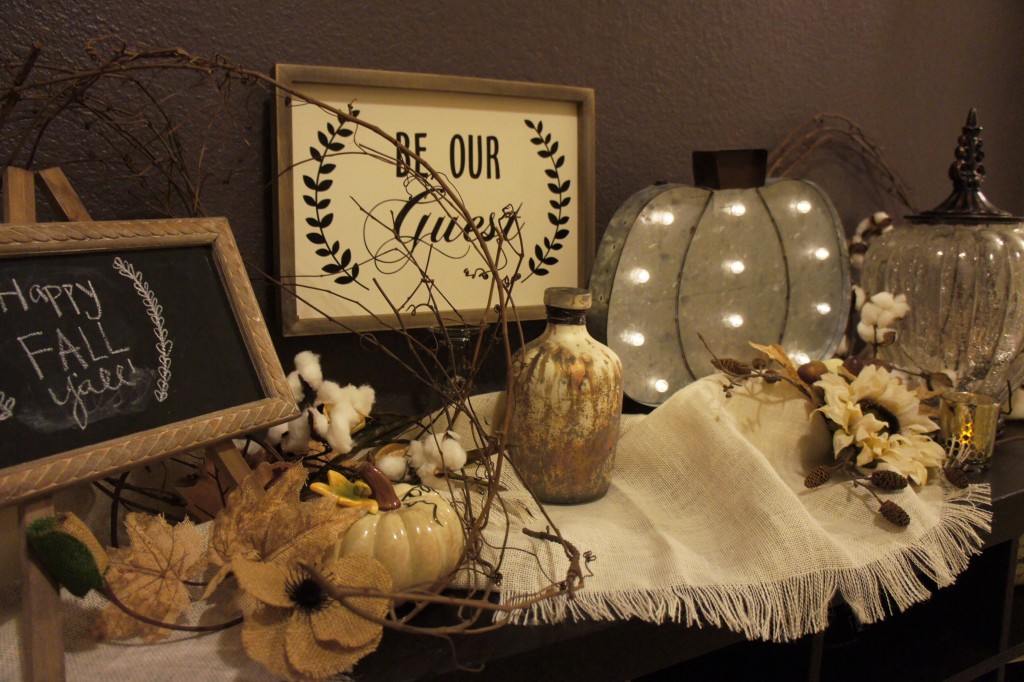 This year on a whim I decided to completely change my typical fall color scheme of warm tone oranges, browns, and maroons & instead channeled my inner Joanna Gaines by incorporating metal pumpkins, an old window, wood and a ton of grapevine. Oh and lots of cotton! Seriously, there could never be enough cotton. Then I finished the look off with little touches of silver throughout. Here's a look at my 2015 Fall Home Tour!
 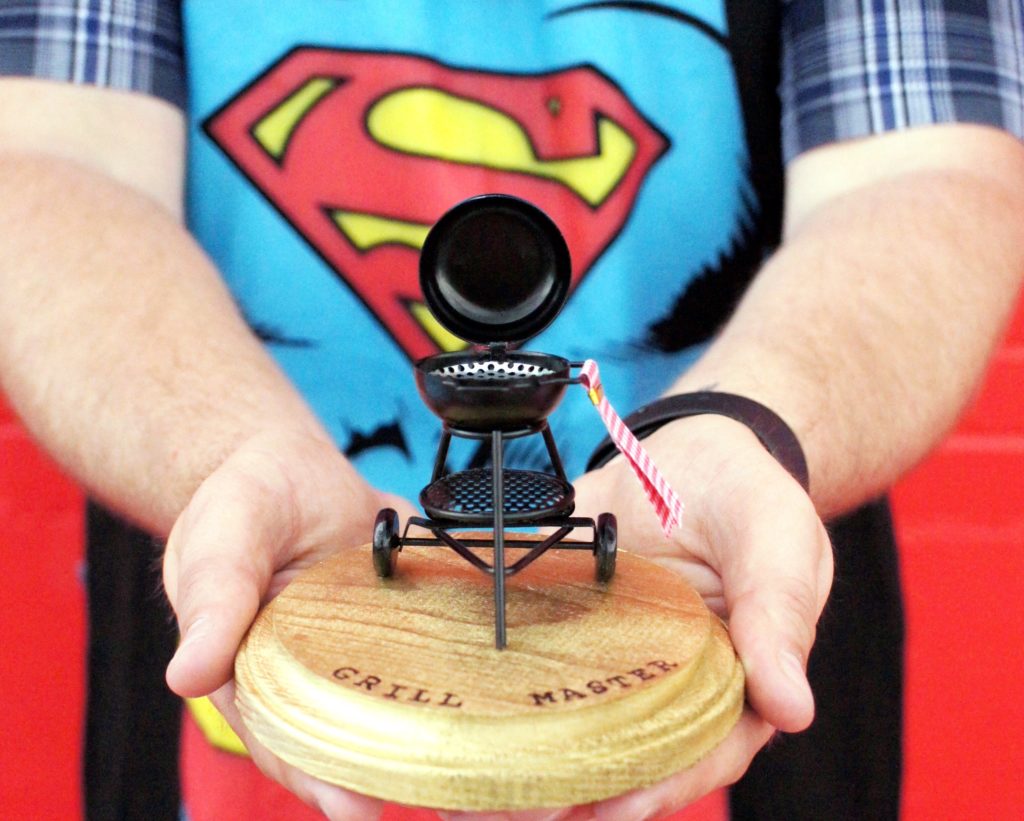 Let Dad know how awesome he is this Father's Day, by giving him this simple DIY trophy.

